Toolkit made by Rashaany Tuinfort
640887
Creative Agency
Class 2G
International Creative Business
Inholland, The Hague
Monday, April 6th of 2021
[click on "design thinking"]
Design Thinking
My name is Rashaany Tuinfort and I am 20 years old. I am a student at Inholland and study International Creative Business. This is my second year. Right now we are in the Creative Agency module. Part of that module is the Design Thinking Toolkit. This toolkit needs to consists of all the tools used for each design thinking phase, what has been done for networking, and an overview of the whole design thinking process and iteration. You can find all of that on this website. Go back to read the contents of the toolkit. Enjoy!
Click on one of the phases!
Go back >>
Interview
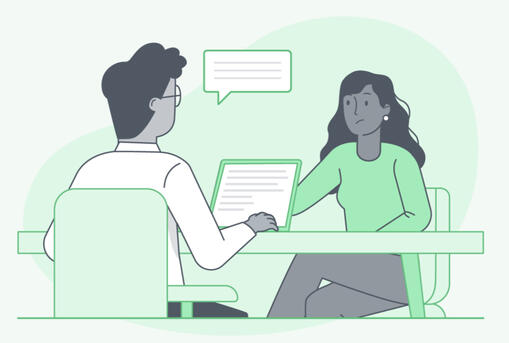
During the empathize phase, you want to get to know the target audience better. You want to empathize with them. This phase is the most essential of all as it fully focuses on the target audience and their needs and problems (Lotte, 2021). To be able to do this, I used the interview method. I can ask them in-depth questions to find out about their current situation, how they feel about it and whether or not they feel like they need to solve it and how (Messier, 2017).
I used this interview method since it was one of the few ways to have direct contact with the target audience and ask them any questions I would like to have answered to be able to continue with the next phases.
Reflection
Go back >>
(Fuscaldo, 2021)
Steps that need to be taken (DesignKit, n.d.):
1. Who needs to be interviewed?
2. When contacting the interviewees, give them a preview of what they can expect and an estimated duration of the interview.
3. Choose interviewees that have different point of views to get different answers.
4. Ask smart and researched questions and be prepared. Know what the purpose of the interview is and what you want to learn.
5. Record the interview.
Empathy Reflection
During the empathize phase I interviewed the client’s target audience. I first did more research about the client and the target audience, so I could come up with the right questions to answer during the interview. After that, I contacted pig farmers (the target audience) to ask if they would like to be interviewed. I had all my questions prepared, but based on the pig farmers’ answers I thought of follow-up questions or left out some of the questions that I already had listed. The interviews were each around the 15 minutes and held via Microsoft Teams.
After conducting the interviews, I realized it would have been better if I did more research on each of the pig farmers individually, so could have prepared more specific questions for them. I think that using the interview method to empathize with the user’s was best way to retrieve more information for the following phases as you have direct contact with the user. You can also ask follow-up questions to get to know more.
Next time I would definitely do more research on each individual member of the target group so I can ask more specific questions to retrieve more information about the target group. This will only be better and make the whole design thinking process easier. This was feedback given to me. I would also start much earlier than I did this time, so I have more time to interview and that way I might even be able to interview more people. This can heavily affect the design thinking outcomes. I do think that the way I approached the pig farmers was professional, however, to get them interested in the actual interview I should have used a different approach.
Go back >>
Empathy Map
The second phase, the define phase is where you take all the information you gathered during the empathize phase and organize and conceptualize it (Lotte, 2021). To define this phase even better, doing an extensive market research on your competitors will make your research more reliable (Lotte, 2021). For this phase I used the empathy map. An empathy map is a collaborative visualization used to articulate what we know about a particular type of user (Gibbons, 2018). The empathy map consists of 4 quadrants, which are Says, Thinks, Does and Feels (Gibbons, 2018).
I applied the empathy phase right after conducting all my interviews and making the transcripts of them. This way all the information I retrieved from the interviews was still fresh in my mind. I decided to use the empathy map, because it gives you a clear and visual overview of all the information you have retrieved during the interviews. It also categorizes them in 4 different quadrants, which can tell you more about how you need look at the information you retrieved.
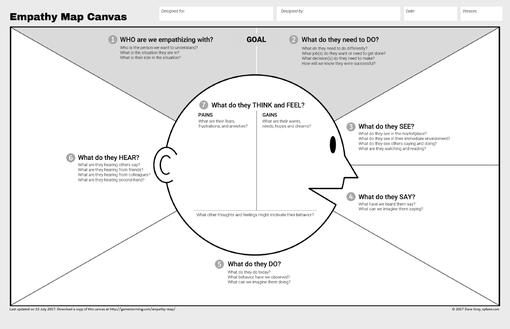
(Grey, 2017)
Steps that need to be taken (Dam & Siang, 2020):
1. Make the four quadrants (Says, Thinks, Does and Feels).
2. Review the information you retrieved.
3. Write down what the user says, does, thinks and feels.
4. Based on what you retrieved from the empathy map, find out the user’s needs.
Reflection
Go back >>
Define Reflection
During the define phase, I put all the information retrieved from the interviews in an empathy map. I arranged all the information in the right sections; Say, Does, Think and Feel. The empathy map model that I used also had a section for Hear. As I found it hard to categorize any of the information in that section, I left it open. To make everything clearer, I gave each interviewee their own colour in the empathy map. That way it is easy to spot the differences. However, I did not mention this in the debriefing.
Using the empathy map made it easy to come up with ideas during the ideating phase, as all the information retrieved was already categorized. You can find it all withing the blink of an eye. For me this meant that I went through the ideating phase faster. This is convenient considering the fact that all the time we have is efficient, especially when we have to iterate our concepts and ideas.
Next time, I would do more research on the Hear category in the empathy map so I can use it. It might could have given some important insights for the following phases. Another idea is to use a different empathy map, where the Hear category is not part of it. This would definitely get rid of some of the confusion I went through while working on the define stage this time. The fact that I colour-coded all the retrieved information is something I would like to implement more in the future as it makes everything even clearer.
Go back >>
Crazy 8s
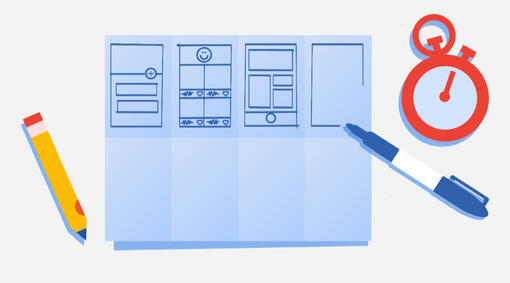
During the ideate phase you come up with as many ideas as possible (Stevens, 2019). By generating all these ideas, you can then turn them into concepts that you can work on in the next design thinking phases. For this phase, I used the Crazy 8s method. This method is group based, which means you have to work on it together (SwitchIt, n.d.). The idea behind it is that each person will make 8 skecthes for ideas within 8 minutes (SwitchIt, n.d.).
Together with my team members, I used the Crazy 8s method after also using the brainstorming method to ideate. However, we did do it a bit differently. Instead of starting with a blank page, we already had 8 themes, which can be seen in the image on the right. This made it easier for us to come up with ideas. It also helped us to think of ideas from different views, which gave us more options.
Reflection
Go back >>
(Moore, 2020)
Steps that need to be taken (SwitchIt, n.d.):
1. Gather the whole team
2. Get everyone a sheet of paper (or in the case of a pandemic, everyone should open a word document or paint app for example).
3. Everyone comes up with 8 ideas within 8 minutes
4. After the 8 minutes, everyone shows each other they ideas.
5. Each team members get three stickers and they stick these to their favourite ideas (in the case of a pandemic, there could be different options to show which ideas are your favourites).
6. The team leader takes notes from the popular ideas to implement them in the next design thinking phase.
Ideate Reflection
During the ideate phase I used the Crazy 8s method. My team and I came up with the ideas together using the Crazy 8s template on Miro. Each section had a theme and based on those themes we came up with ideas. The ideas were written. Because it was hard for us to come up with ideas, we did spend multiple days using this method.Using the Crazy 8s method with themes for each section, made it easy to come up with crazy ideas that we otherwise would not have thought of. It also made it possible for us to already think of potential prototypes for the prototype phase. This was convenient as you are already a step ahead then.
Next time when using this tool, I will make sure to do it the correct way, drawing the ideas. As we used this tool together on miro, this was not very convenient for us. However, it is important that we use the tool the correct way. I will also keep track of the time to make sure we stay in the 8-minute limitation. I do have to say that using the themes for each section really helped out, so that is something I would like to implement in this tool again in the future.
Go back >>
Storyboarding
Storyboards communicate a story through images. At the top of the storyboard there is usually a persona and situation described. When it comes to the visuals, there will be sketches for each step. Under trhese sketches you can also find captions to give a better understanding of the image. The captions are usually do not exceed two bullet points. (Krause, 2018)
For one of the concepts, I used the storyboarding method. Since the concept will be used on tiktok, each storyboard has the layout of an actual tiktok to make it obvious for the user what the end product is going to look like. A total of 7 frames were made and each frame clearly shows what is happening. The colours that were mentioned by the target audience during the empathizing phase were used. Next to each frame there are notes which shows what will be said in the tiktok.

(TallBoy, 2016)
The steps that need to be taken (DesignKit, n.d., Krause, 2018):
1. Make sure you know what you want to prototype.
2. Draw your ideas into the storyboard.
3. Describe your persona and description at the top of the storyboard.
4. Add captions to each of the storyboard frames.
5. Show the storyboard to your team members for feedback.
Reflection
Go back >>
Prototype Reflection
During the prototyping phase I used the storyboarding method. I first wrote down what I felt like needed to be in the storyboard. After that I started drawing and putting everything together. I did this all on paper and later scanned the storyboard as a document.
As this is basically the preparation for the testing phase, the tool that I use during the prototype phase, has a lot of impact on which tool I will need to use during the testing phase. For example, first-click testing cannot be used when testing a storyboard as there is nothing the user can click on. That is why it was very important to know which tools I wanted to use for both the prototype and testing phase, so they can match well.
Next time when using the storyboarding method, I would like to try it digitally. That way the storyboard will look neater and the text on it will be easier to read for everyone. There is always possibility that some users cannot read my handwriting. It would also be better to make sketches before making the actual storyboard to make sure there are no mistakes. Luckily that did not happen this time, but it is always better to be pre-cautious. I did like how I made the storyboards in an actual TikTok layout so the user really knows what it is all about. I would like to implement this in future projects.
Go back >>
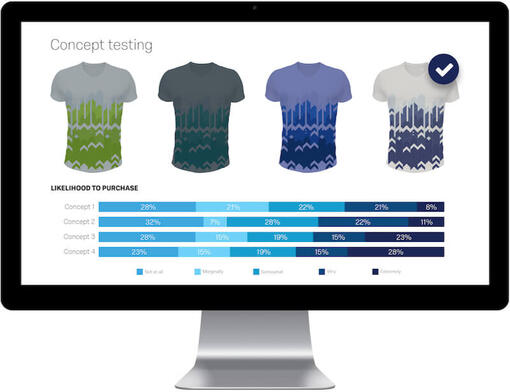
Concept Testing
Prototype testing can be done in different ways; remote and in-person testing. In-person testing means you are in the same room as the user, while remote testing gives you little to no control over the user’s environment. When it comes to remote testing, it can be moderated or unmoderated. Moderated is considered live testing, which means you can observe the user through, forexample video call. Unmoderated testing is basically the opposite of moderated testing, which means the testing is not live. (Stevens, 2019)
Concept testing is used in the early stages of design thinking for lo-fi prototypes. You show the prototype to the users and interview them about it to know how they feel about the concept. (Stevens, 2019)
I made a storyboard for one of the group concepts, a tiktok video about how poor pig welfare is in the Netherlands. This storyboard is supposed to show what the hi-fi prototype will eventually look like. But before that, I would like to know what the target audience thinks of this. That is why I showed the storyboard to users and asked them questions about what they would do and if they felt like the video needs improvements. The insights provided during this part of the testing phase, will be used as iteration for the hi-fi prototype.
(Qualtrics, 2021)
Steps that need to be taken (Kapoor, 2021):
1. Identify participants for testing.
2. Select the participants
3. Prepare questions for the participants to answer.
4. Show the concept.
5. Ask for feedback.
6. Capture feedback.
7. Integrate feedback.
8. Implement feedback in the final concept
Reflection
Go back >>
Testing Reflection
During the testing phase I used the concept testing method. This matched the best with the storyboarding method used in the prototyping phase. After making the storyboard, I came up with questions for the user to answer. I then showed the storyboard to 5 users and interviewed them with those questions I was given feedback by the users to improve the prototype so I can test it again.
Iteration is part of the testing phase. This means that each time the user gives feedback on what can be changed, you have to go back to the previous phases. This shows how this phase is heavily connected with all the other phases. In my case, after receiving feedback from the users, I had to go back to the ideating and prototyping phase.
Next time I would start earlier with this phase so I have the ability to test the prototype on more users. This makes the insights more viable. But with that being said, I do think that the questions I used for the concept testing were helpful for the iteration process of this phase.
Go back >>